Showing posts with label roof. Show all posts

Thursday, July 26, 2018

Metal stairs in industrial loft

If I thought that the steps were a challenge I was a little blue-eyed...
The handrails were just as difficult!


I worked with polystyrol profiles again because it is easier to glue the same two materials together. For a minute, I thought about using wood but quickly dropped that idea.
I wanted to have them all glued and completed before I spray-painted - so that I could fix them to the landing and it was all done. The plan was a good one... but then once in it still needed adjustments and tiny spacers.
Well, it is done now and I am mighty proud of it!!
I have even put some screws into the steel construction to make it look as real as possible.
And the spotlights for the lower floor are well hidden in the real balsa flooring. The back of the room box looks a little adventurous... hihi


The rear wall warped a little - so, I got some picture rails (the metal ones that are fastened to the top of the walls) and glued them with epoxy to the back. It did the trick...

And the entrance door is in as well. Do you think I should put an EXIT sign on it?

I spent last weekend in Paris with a friend and we scouted mini shops as well. The best one was La BoĆ®te au Joujoux where I found the bike for this scene. They have the 'regular' dollhouse stuff but the odd 'fine scale' goods as well.

wonderful detail work - and all this for € 14 !!!!

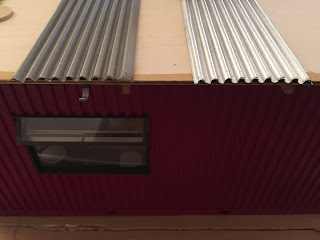
I have completed the roof already - well, the inside of it. This is an old building but when renovating something like this it definitely needs an insulated roof and all... not just bare corrugated iron!
cutting the stryol curvy to fit the roof shape

spray-painted and drilled 0.8mm holes for the jewelry wire
Structure held together with jewelry wire
But before putting the roof on, I have to complete the inside because I need easy access. So, I guess next will be a stainless-steel kitchen to fit the style...

And BTW: the video of Farmhouse Room Box is now online - complete with Swiss sound :-)

Enjoy summer!
Marion


Monday, December 4, 2017

Inside complete!

The photos say it all!

Homeoffice

please note the paperclip  ;-)

Lounge

I had to re-do the light above the dining table because it was not bright enough. Pity... the original was much better...

Photographing is never easy: xxxx shots, getting extra lights, and then there is glare in the window or dust or specs on the floor ... back to starting again! What a crux being a perfectionist (only with minis!!!) ....

It seems as if the house building is coming to an end :-(

Gutters and down pipes:
I used 12mm black binding combs, glueing two together to get the half round shape
Bent the cut off rings to make the gutter holders

Working with foam board it was easy to press and glue these into the roof


Down pipes made from wood dowels. The devil is in the detail: I had to make the end part hollow...
Painting thin wood panels without warping:
I did not like the wooden walls ouside around the high windows. Easy - paint it concrete. Haha, we all know what a water based paint such as acrylic does with 1mm wood panels! I tried to to seal the wood with polymer glue but that did not work. The only solution will be to cover the entire side with a new panel: cement paint on styrene. But I first had to order more concrete paint...
I

Since Patricia Santi did not respond to my request for Moon Boots, I had to make them myself!
The process made me admire all those who make these cakes and stuff from polymer...

Hey, we had first reasonable snow this morning (400m a.s.l.) !! Was waiting for this because I want to take background photos for the video of the house.


And: Festive Season in full swing!
Hugs, Marion


Monday, January 2, 2017

Tutorial Mediteranean Roof


After much testing and trying other tutorials, this is what worked best for me.
But mind you: it is a luxury version because of the amount of tiles it needs!!
And I needed to make sure that the house can actually cope with the weight...

I decided NOT to have two layers of tiles (bottom and top) but to fake this only at the endings.
Reasons: the roof would have become too heavy and it is difficult to keep the tiles straight without the guidelines of the cardboard. Because there are no reverse tiles at the bottom, I had to arrange them a little closer than usual. This way, the cardboard is not visible. I covered about 1/2 to 2/3 of the underlaying tile with the next one. I needed 120 tiles for an area of 20x20cm!

The materials I used:
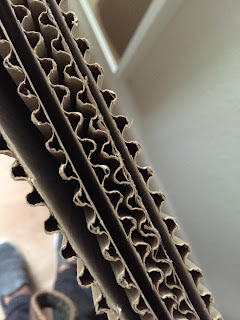
- Packaging cardboard (preferably not 'sandwiched' but open on one side, or peel off one side) with a 1cm wave.
- Clay roof tiles from Indalchess.com. The size I used is: length 3.5cm, width 1.6cm to 0.6cm (narrowest side). Exact description: Arab miniature tiles 35mm long. Ref. 3500771 Keranova.
1:10 scale is too large, I tried that..
- Chalky paints to color the tiles
- Wood strips for the facia, stained
- White glue
- Acrylic terracotta paint

1. I tiled the roofs before glueing them onto the house: glued the packaging cardboard onto 5mm foam board.
IMPORTANT: makes sure that you have an EVEN number of ridges.

2. Glue facia on sides, making sure it is wide enough at the front to add guttering if you want to.
Glue facia on side ensuring that the top is level with the ridges of the cardboard - to make an additional ridge on both sides.
Tip: if you want to attach guttering, the facia must be wide enough...

3. Stain or paint facia boards
4. Color the 'valleys' of the cardboard with terracotta shade crayon, feltpen or acrylic paint.


5. Color the clay tiles. I used white chalky paint, partially watered down or added other shades to create an uneven colored, lively roof.


6. If the underside of the roof is visible, best to now glue the faux roof underneath. Here one to download.


7. Lay roof tiles, using any glue. The white wood glue worked perfectly well for me.
Start at the gutter side and let them protrude minimum 1cm (try and see if the the guttering fits).
I used 17mm spacing laying these tiles.
I waited with attaching the last row of tiles in case I need to trim them.


8. Fake endings: I cut the tiles with my table saw and glued the small pieces under the first row of tiles.


9. Glue roofs onto the building. For added stability I insered wire rods through the roof into the side walls.
10. Then glue the last row of tiles onto roof and add the ridge. Ridge: make sure that both sides are level. In my case, I still could see through the roof top under the ridge - so I inserted painted strip of cardboard or wood before adding the ridge tiles.


I hope that this helps someone interested in Mediteranean mini roofing!
Marion


Monday, February 15, 2016

Sundeck part 2

... and other things---

TRARA! Done...
The sail softens the industrial look of the building ...


And the roof is on as well. My graphic artist friend Denise (who is the girl-friend of my one-line game buddy) works for a packaging company. I wanted large waves that were not sandwiched between two cardboards - she made it possible ordering some samples for me !!! 
Thanks Carol, Denise and Annina for helping me make the decision about the color. The 'ageing' bit will have to wait until you come to my place to do this, Annina :-))


Because I am really no good at painting, I used very fine real concrete to make the floor in front of the house ... had to cast a bit more to make the gully look real :-)

And then I noticed that the nano light in the ceiling at the entrance was greenish!! Horror!! There must be a bit of green in the wall paint - or maybe the light itself tends to give a green light.
I could resolve it to some extent by putting a brown parchment paper over the light. Now I can live with it. Hehe, and the entrance is finished as well! 


And here how I hid the electrical input:

First I tried the yellow ones used for model airplane building. But they were too tight - kept ripping the socket out when I wanted to unplug. Then I found these insulating screw joints - wonderful tiny and hold together perfectly :-))

At the end of a project, all of the sudden things come together very quickly - I thought that I had another 2-3 weekends to go. But there is not much more to do: looking for a bedspread in the right color, making the patio table, attaching the solar panels, a bit of vacuuming inside and cleaning the windows :-)

And then the photo shooting to make a short video again - this time on he beach. There are small patches of sand around our lake here - but do I really want to transport the model there??