Monday, December 2, 2019

1:12 Industrial Loft model completed!

Uff, it took me a while to finish this. But motivation is not the same every day ;-)

Well it is done now and I have made two videos over the past three weeks.
It is incredible how long it takes to make an interesting short film!!!

The cutting an assembling for both videos was done in about 12 hours.
But selecting the right pix, fixing the exposure, etc.
And finding the right tools to make a clip that was steady and had the right focus.
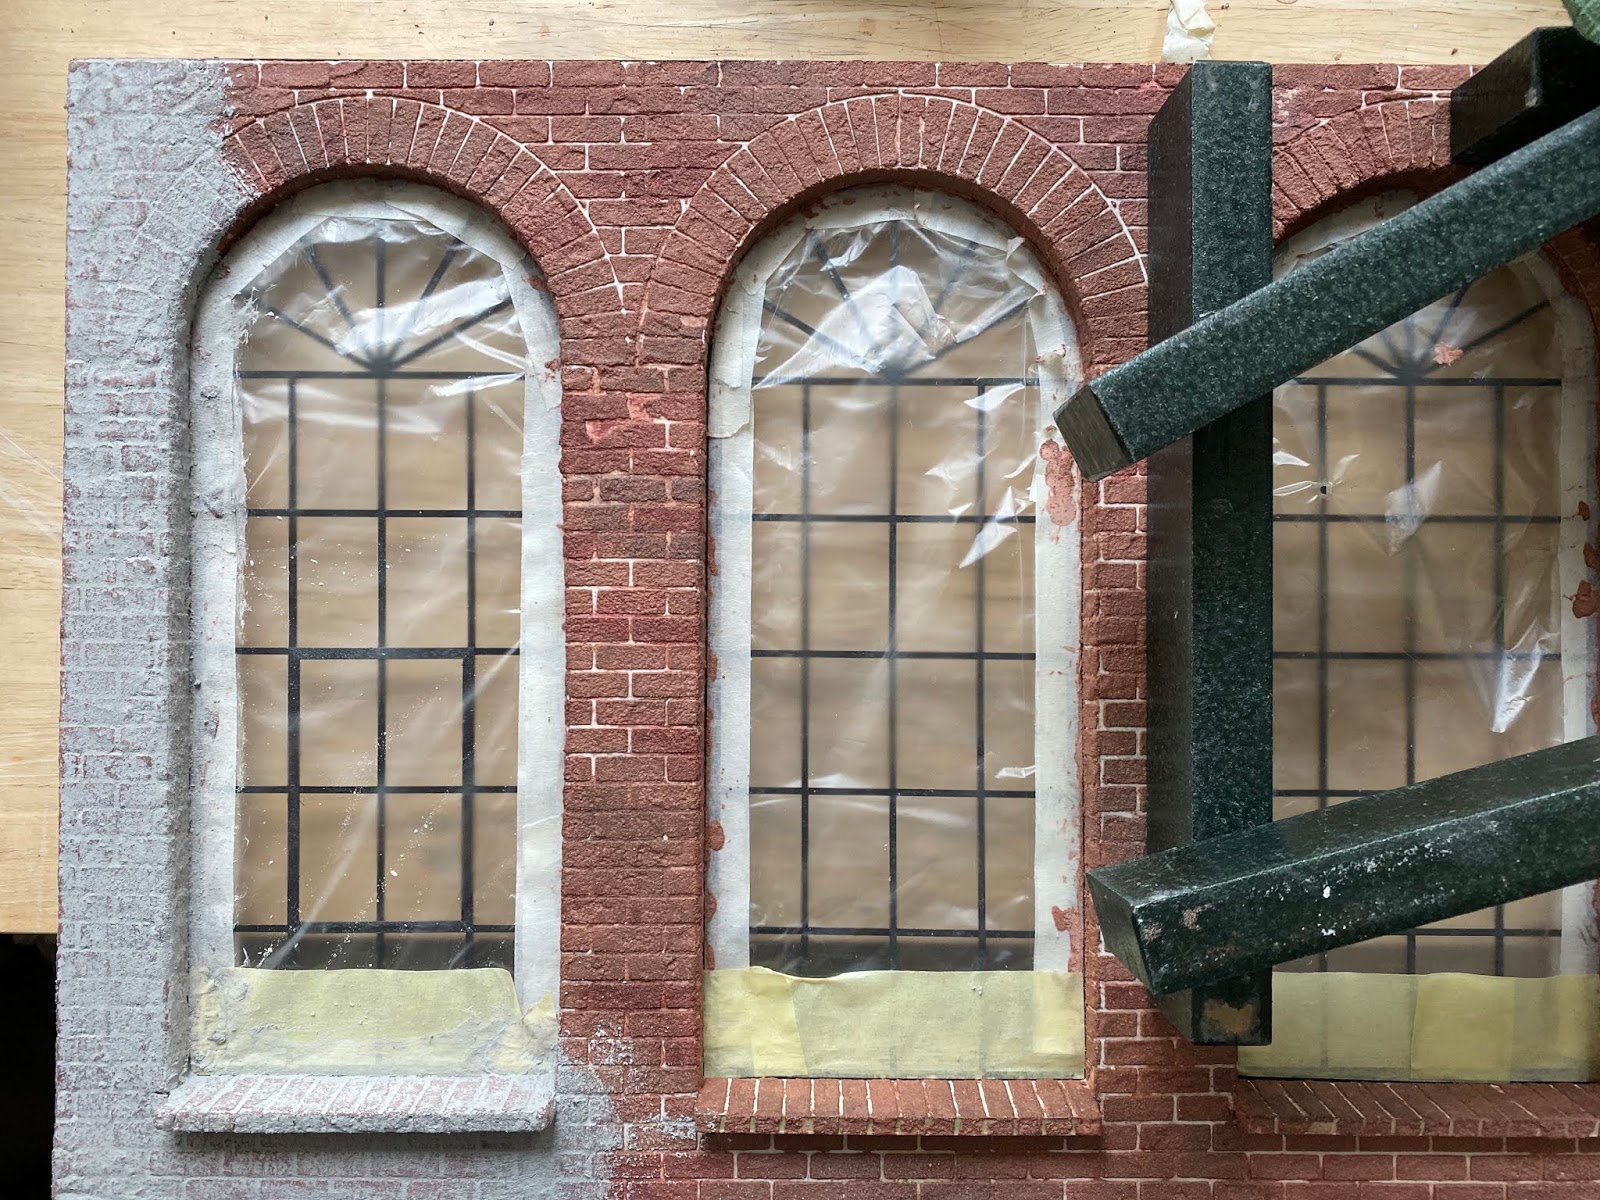
Very time-consuming and sometimes frustrating... you think you have it all just to see that something has fallen down, or the windows have too much glare from the outside, etc.

DONE!!!

Here the house:


And here the 'making of' video:


I hope you will enjoy :-)


I wish you all a wonderful Festive Season!

Marion

Tuesday, November 5, 2019

Arched windows in brick walls

I knew that this smelled like trouble!!!

The plan:
fitting arched windows into a brick wall. Obviously, the window frame is brick as well.
Simple, right?
The reality:
even though I got the perfectly lasered windows from Pepper already months ago, I ignored them and did other things. Until now. I knew perfectly well that this would be a difficult part of the build because I have seen friends who seem to have abandoned their project when they could not get it right 😉

So, here a step-by-step description - just in case someone else wants to have a go at this... haha.
  • I cut the opening into the 2cm foambard as accurately as I could.. ha
  • I decided that I wanted brick window sills on the outside
  • I sprayed the windows
  • I glued a 2cm cardboard strip around and fit them into the openings
  • I glued the windows with frame into the opening
  • I polyfilled the gaps around the window frames - and realized that the brick stencil was smaller than actual arch... my design mistake ... grrr...
  • I covered the windows to protect them from the brick plastering, hoping that I won't rip off the plastering when I remove the masking tape..
  • I was fed up and distracted myself, went to Zürich and bought an iphone11pro - the camera with the 3 lenses is out of this world!!!
  • I plastered the outside wall and around the corners right to the window itself. Fiddly stuff. Used Bromley's stencils and brick compound. And I used the weights so that this would not warp!!!


  • I rewarded myself with 10 days in St. Remy-de-Provence, France
  • I then had some urgent projects at work..... by now it is November....
  • I attached the magnet to house and outside wall
  • I plastered the inside wall 
  • I plastered the window sills (to be glued in later)
  • Now I cut the stencil so that I could use this part so that the brick went round the corner to the window frame.

  • I colored the bricks with water color to make them look real, applied two coats of matte acryl varnish to seal the bricks, waited...  Grouted. The grouting process is delicate because most of it needs to come off the bricks again: if done when not dry enough it will attack the varnish, if done when too dry it does not come off. And as always: weights to prevent warping...
  • I made a black cardboard frame around the windows inside
  • I attached window sills inside and out

More progress:

the loft now has roofing and all the ceiling lights are in as well
I made a trash bin for the kitchen and a sports bag together with my mini friends from Basel


.. and I made a dining room table


So, enough. Now it is time to finish off inside...
Hugs
Marion

Monday, June 17, 2019

It is a man's world and loft ...

... and that it why the sofa HAS to be leather!!
I personally would not even consider leather as an option because I always slide around on this material. But all my male friends are totally set on leather couches....


Granted, with a carpet and some accessories leather looks pretty cool!


The reading spot that clamps onto the iron pole needed a bit of creativity. I found the shade in a model building shop for ship models. After spending some one hour in there I found these metal parts, hoping that I could use them for the clamp..


And now this guy needs a TV and some sort of a bookshelf....

Hugs, Marion

Sunday, June 9, 2019

Kitchen Loft Style

Going to the 1:12 Fair in Rheda, Germany, and seeing my mini friends has inspired me again!
So, I finally completed the kitchen in my loft.

I thought that this kind of apartment does not need a kitchen fan - enough air circulating ;-)
I found these handles in a shop for model airplanes.

Here some details...
Note the light in this cupboard and I managed to put rails for the shutter on the sides. Bending the brass without losing the grove of the rail was the challenge...
The toaster and kettle are from Minifanaberia - just perfect as always!
I even fround garlic, onions and potatoes for the basekt!

Oops, the soap seems to fall over just now! But the industrial look faucet from Mini Arquitect Fransciso is super realistic!
The tools on the wall are from various sources: Minifanaberia, Pierluigi and the brush I made myself.

And the bathroom is now fully equiped with toothbruh, towels and all. I have not managed to find a shaver as yet, since Ulus Miniatures does not sell online any longer... just at fairs ;-(.


Next up: making furniture for the lounge...

Marion

Friday, April 19, 2019

Miniature Console Table and real life...

It has been a while - but then: I was in South Africa for a while and came back with more of this funky fabric. I finally could make a real cover for my real life sofa!!
Gervasoni Ghost sofa cover


My new-old home is now pretty much how I wanted it. Except for a custom made hallway console table. I scouted without being successful. So, I designed my own fit-to-measure. First a mini model...


And in the end, it all turned out differentlv :-)....

Not terribly active on the mini side at this moment. I had to catch up at the business front and now that the inside of my house is done, the garden is next!
My loft project is still pretty much where it was 5 months ago - and I am a bit stuck with the color of the kitchen cubpoards...

However, I am going to 1:12 in Rheda in May and hope to get inspired again....
And then I can hopefully show you some progress!

Marion


Sunday, January 20, 2019

1:1 renovation completed


I promised to show some before/after photos... here they are!

before
after
Fireplace before

Fireplace and lounge after 

Kitchen before
Kitchen after: movable bar counter, and a dishwash drawer (!) at working height 

before; TV corner

after : dining area
Entrance before


Entrance after - with a open closet for ALL my shoes, coats and handbags!!!

Before, my office
After, my bedroom with en suite bath


Before: sun room and where I stored my mini houses (round the corner on the left..)
After: sun room with foldable guest bed.. and I just love this wallpaper!

After: making one room out of the kids bedrooms for minis and office


Building can be painless with the right workmen: mine were tremendous, they worked hand-in-hand with each other. They were done in 9 weeks with all the new floors, walls, false ceilings, electrical wiring, new bathrooms, custom made kitchen, plumbing and all. I was afraid that all this indirect LED lighting would not be homely - but, boy, the technology today is just fantastic!

Moved in mid December again - love the wood and bright-airy look. My mini models certainly inspired me to design this concept. And - cleaning out loads of stuff was such a relief! 

So, now I am walking around with a constant smile :-))))
Still need to make a few curtains and things and then I am back into mini-building again.

Marion