Showing posts with label tutorial. Show all posts

Monday, April 6, 2020

Tutorial scale 1;12 round modern wood Dining Table


You need:
·      basswood, thinner one for the legs, thicker (3-4mm) for the top.
·      balsa for the centerpiece
·      Sanding paper and patience

I started off by making a prototype in cardboard. The most important was that the legs looked proportionally right.


Once happy with the look, I cut a tabletop and sanded it on the disc sander to a perfect 12cm circle.
Then I sanded the edges so that the appearance of the tabletop became elegant.

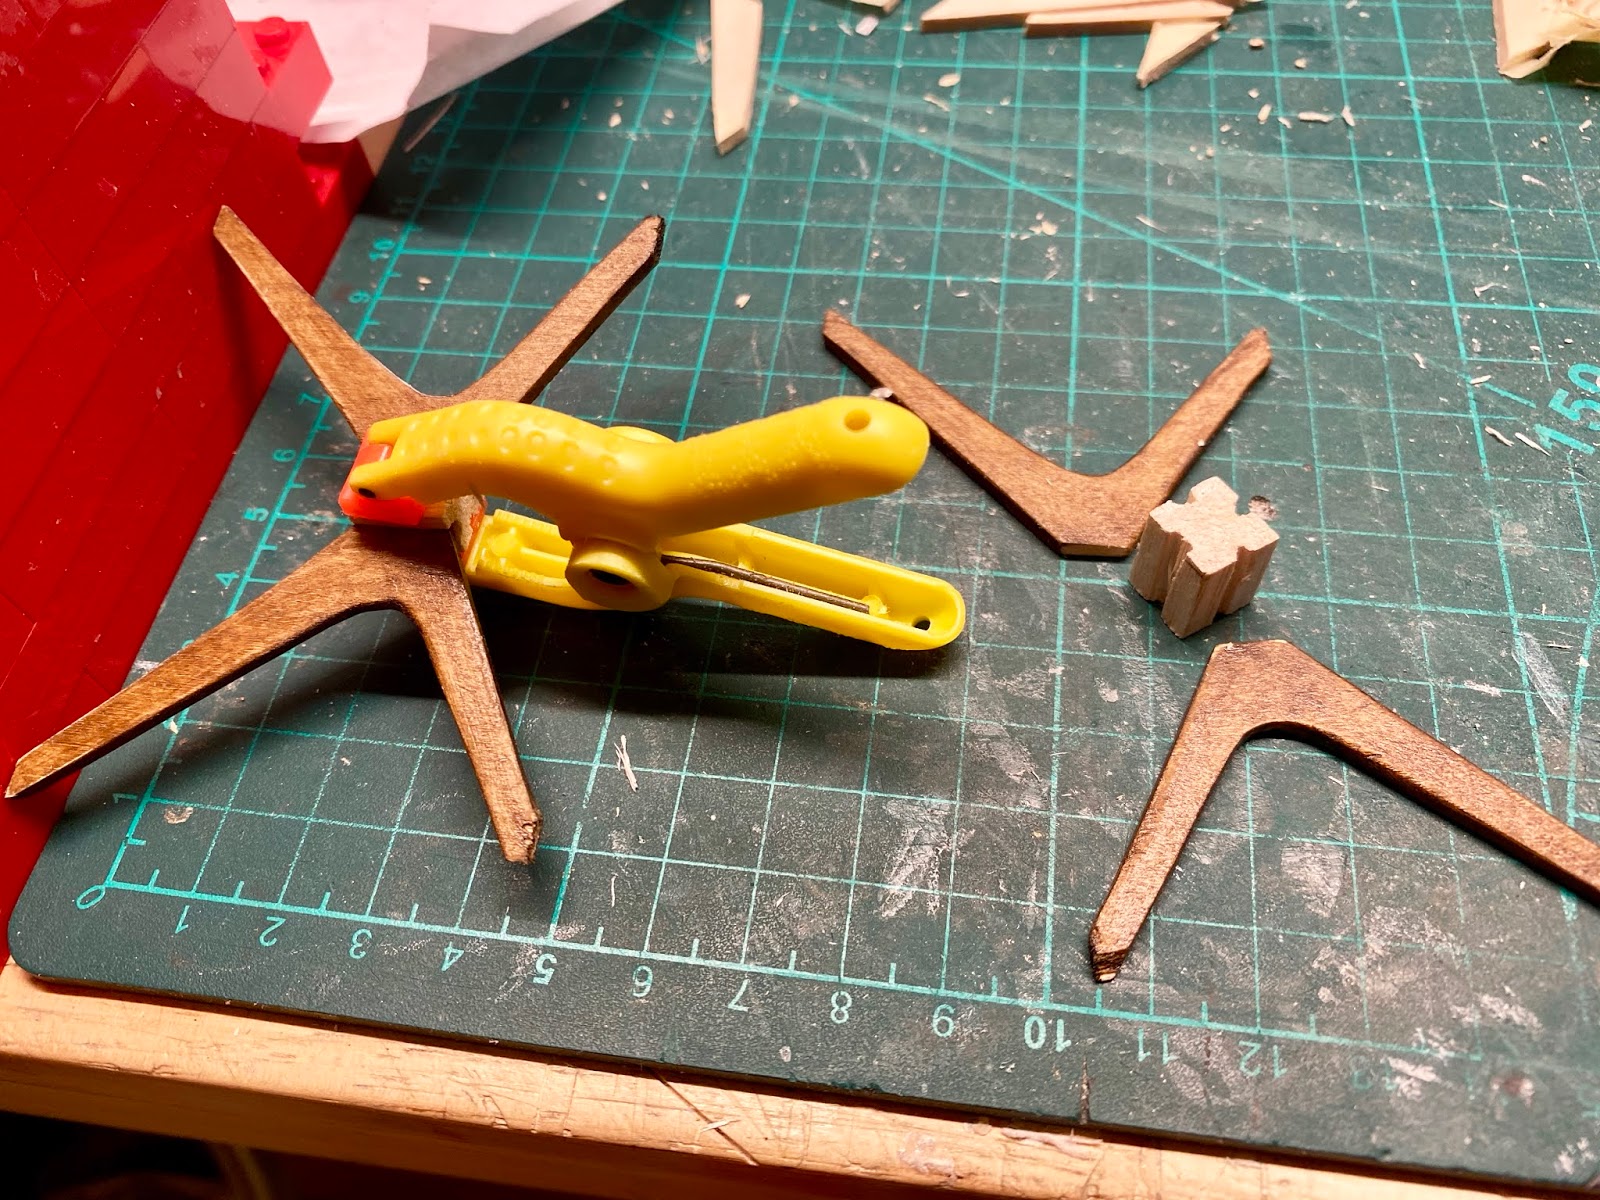
Then I used this template to make 4 legs.


Best to wrap the basswood with masking tape because it easily chips when cutting.
I cut mine with a standard japan knife because basswood is not very hard.

Next step: made a square balsa piece into a ‘cross’. This is about 1.2cm long.
Then glued the legs one by one onto that piece using a Lego guide so that the legs all touched.


Painted the center part and the table top with ‘walnut’ glaze (Lasur), and then hoped that the top was dead straight!

Alas, the level did detect a flaw!


The easiest way was to add a piece of paper/cardboard right under the table top.
Sanding off to get it level is much more difficult and usually spoils it all.

Now the table was ready to be shown off!

Monday, December 4, 2017

Moving patio door

Here a follow-up on today's blog (especially for Kristine from paperdollminiatures  ;-)!


How-to-do the hinges was the issue...

I decided to use black electrician tape (very sticky and is a bit elastic) to attach the panels to each other. Then I covered this with the window frame pieces, made from styrene strips.
Note: I used double sided sticky tape to attach the frame strips to the acrylic glass - after messing up a first lot with glue... ;-)

I then drilled tiny holes into the acrylic glass (2mm thinck) to insert the pins at the top and the bottom of the panels.
The grove at the top and bottom:


And that was it!


Thursday, February 23, 2017

Tutorial wooden folding chairs

Once I found the right drawings and measurements making these chairs was quite easy.

They do not really fold but it is easy to make a folded one with the these drawings.

Materials needed:
  • Wood strips 3x2mm
  • Round 3mm wooden sticks or skewers
  • Wooden U-shape profile with 2mm inside measurement
  • 7x1mm wood for back rest


Download drawing with measurements


Construction
  • wet back rest, bend and let dry round  a bottle or so
  • cut the wood pieces and sand them lightly
  • make the seats with the u-profiles and wood strips
glue side pieces together using a fram of some sorts

glue seat onto the one side

place chair upright against a straight wall and glue on other side

glue backrest and foot rests between sides
- paint or varnish but don't spray them accidentally with a primer instead of varnish like I did 😏. Well, they are now in for a color rather than looking like wood..
- stick 'metal' hinges onto sides

The only fiddly part is the assembly. But with forms and guidance bits it works just fine.

Enjoy -

Marion


Thursday, September 15, 2016

Pottery Studio and landscape

Not finished inside... lured by something else than bedrooms ;-)
Great that there are no deadlines in this project... hihi

South European gardens do have Cypress trees! No question: I want...
And I found a great tutorial that works in 1:12 as well.
I used the coarsest steelwool on the market, sprayed it brown, and then added NOCH moss green. Worked like a charm :-)

Southern European gardens do have plane trees (Platane) as well... mh....
Found a piece of wood (seems to come from special oak species, maybe a bonsai..) at the local nursery that could work. Poor thing is going through a tough few months now: the wood is still a little green and I hope that I can straighten out the stem. And then I will be in for a bit of punching and gluening... eventually.

And I made a climbing plant (to cover the cracks in the wall...): using paper covered wire which I could paint and glue on, a mini punch from the punch bunch and tissue paper, which I sprayed with all sorts of greens, a bit of red and orange. Wonderful work to do when 'hearing' TV....


I thought that adding a garage and potters studio is not going to make much of a difference - the project is big anyway... might as well.

I have decided on pottery studio because I did pottery many years back and know what that should look like. The nice part: here, things do not have to be perfect...
After getting that far, I noticed that I forgot old newspapers, which are quite important for a potter to cover pieces so that they can dry slowly. 
I made some tools already - but need a different container...

and am quite ambitious now to get anywhere close to this potter's wheel...

What fun this is!